There’s something about Tuesday afternoons that makes me crave something quick but satisfying. Last week I threw together these Cheesy Garlic Chicken Wraps using leftover rotisserie chicken, and honestly, my family devoured them in minutes. The combination of creamy cheese, aromatic garlic, and perfectly crispy tortillas creates a meal that tastes way more complicated than it actually is.
What I love most is that these wraps come together in about 20 minutes using ingredients you probably already have. No fancy techniques, no hard-to-find ingredients, just simple comfort food that works for lunch or dinner.
What Makes These Wraps So Good
The secret lies in the garlic butter that gets brushed onto the tortillas before cooking. It creates this golden, crispy exterior while the inside stays soft and gooey with melted cheese. The cream cheese adds richness to the filling without making it heavy, and the Italian seasoning ties everything together.
Unlike traditional wraps that can fall apart or get soggy, these hold up beautifully thanks to the pan-searing technique. The cheese mixture binds everything while creating pockets of melty goodness in every bite.
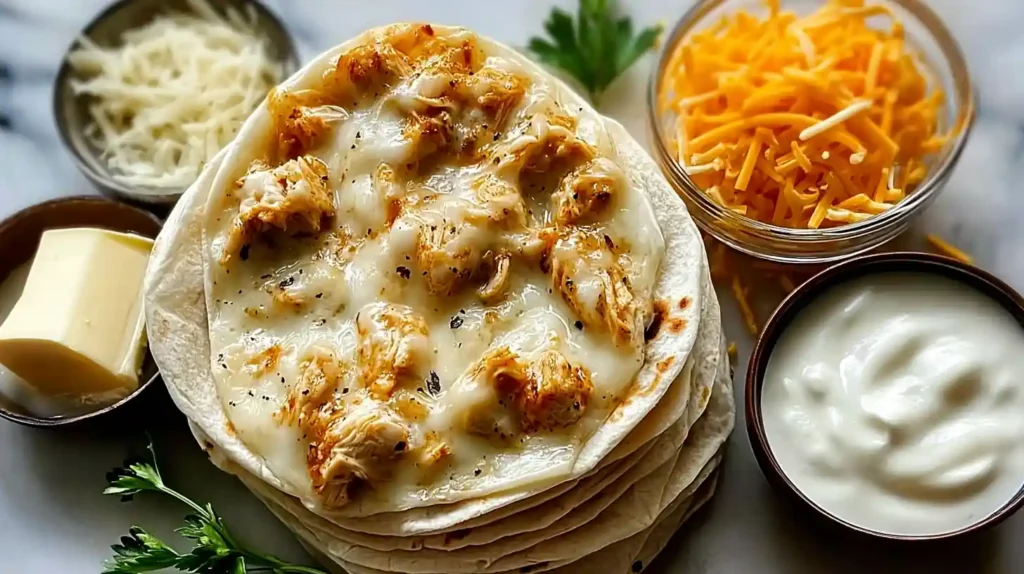
Gathering Your Ingredients
You’ll need just a handful of pantry staples to make these Cheesy Garlic Chicken Wraps. The beauty is in the simplicity, so don’t overcomplicate things.
- 2 cups cooked chicken, shredded or diced
- 1 1/2 cups shredded mozzarella cheese (cheddar works great too)
- 1/4 cup cream cheese, softened to room temperature
- 1/4 cup sour cream
- 3 cloves garlic, minced
- 2 tablespoons butter, melted
- 1 teaspoon garlic powder
- 1 teaspoon Italian seasoning
- 4 large flour tortillas
- Salt and black pepper to taste
- Fresh parsley for garnish (optional)
Step-by-Step Assembly
Start by warming a skillet over medium heat and melting half the butter. Add your minced garlic and let it sizzle for about 30 seconds until fragrant. Be careful not to let it brown, because burnt garlic tastes bitter and will ruin the whole flavor profile.
Toss in your cooked chicken along with the garlic powder, Italian seasoning, salt, and pepper. Stir everything around for about 2 minutes just to warm the chicken through and let those seasonings bloom. Remove from heat and set aside.
In a mixing bowl, combine the cream cheese, sour cream, and about half of your shredded cheese. Mix until smooth and creamy. This becomes the binding agent that holds your filling together while adding incredible richness. Fold in the seasoned chicken until everything is evenly coated.
Lay your tortillas flat on a clean surface. Divide the chicken mixture among them, spooning it down the center of each one. Sprinkle the remaining cheese on top. Fold in the sides first, then roll tightly from the bottom up, making sure everything is tucked in securely.
Getting That Perfect Golden Crust
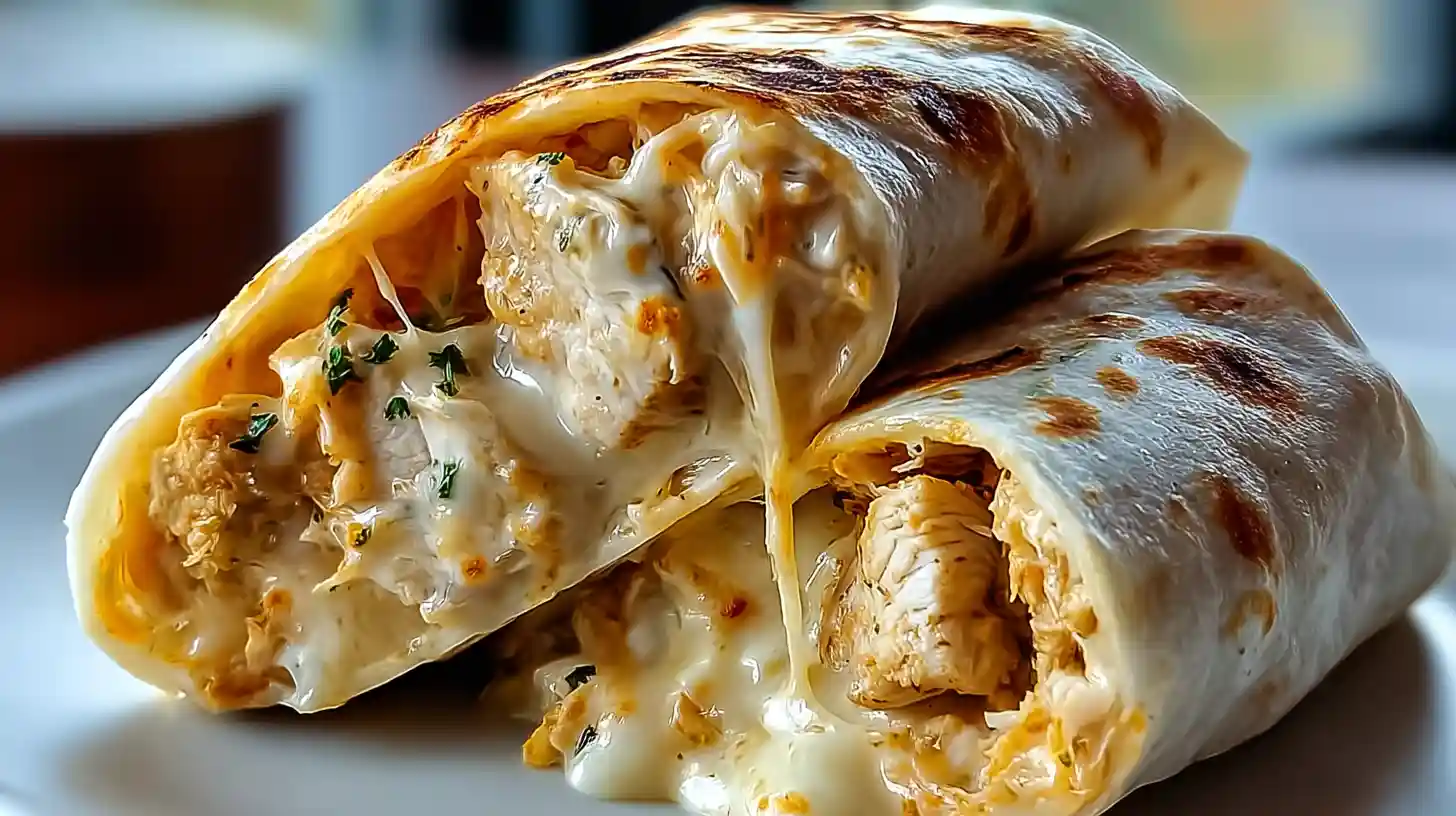
Heat a clean skillet or grill pan over medium heat. Brush the remaining melted butter onto both sides of each wrap, or you can brush it directly in the pan. Place your wraps seam-side down and let them cook undisturbed for about 2 to 3 minutes.
You’ll know they’re ready to flip when you see golden-brown spots forming on the bottom. Press down gently with a spatula to help seal everything together and encourage even browning. Flip carefully and cook the other side for another 2 to 3 minutes until the cheese inside is fully melted and oozing.
Smart Ingredient Swaps
Running low on certain ingredients? These wraps are incredibly forgiving. Swap the mozzarella for Monterey Jack, pepper jack, or even a Mexican cheese blend if that’s what you have. Greek yogurt can replace sour cream in a pinch, though it’ll taste slightly tangier.
For the chicken, rotisserie is easiest, but leftover grilled chicken, poached chicken breast, or even shredded turkey all work beautifully. If you want to make this vegetarian, try using seasoned black beans or roasted vegetables instead of the meat.
Whole wheat tortillas, spinach wraps, or low-carb tortillas all make great alternatives to standard flour tortillas. Just keep in mind that different tortilla types may require slight adjustments to cooking time.
Serving Suggestions and Pairings
These Cheesy Garlic Chicken Wraps shine on their own, but they’re even better with a few simple sides. A fresh garden salad with vinaigrette cuts through the richness perfectly. Tortilla chips with salsa or guacamole make a fun addition if you’re feeding a crowd.
For dipping sauces, try ranch dressing, marinara sauce, garlic aioli, or even a simple sour cream mixed with lime juice and cilantro. The wraps are sturdy enough to handle dunking without falling apart.
Cut them in half diagonally before serving to show off those beautiful layers. Garnish with chopped fresh parsley or a sprinkle of extra cheese if you’re feeling fancy.
Storage and Meal Prep Tips
Leftover wraps keep well in the refrigerator for up to 3 days when stored in an airtight container or wrapped tightly in foil. Reheat them in a dry skillet over medium-low heat for the best results, as this helps maintain that crispy exterior. Microwaving works in a pinch but tends to make the tortilla a bit soggy.
For meal prep, you can assemble the wraps ahead of time but don’t cook them until you’re ready to eat. Store uncooked wraps in the fridge for up to 24 hours. You can also freeze cooked wraps for up to a month, though the texture won’t be quite as perfect after thawing. Wrap each one individually in plastic wrap, then place them all in a freezer bag.
The chicken mixture itself freezes beautifully for up to 3 months. Make a double batch, use half now, and freeze the rest for an even quicker meal later.
Troubleshooting Common Issues
If your wraps keep falling apart, you’re likely overfilling them or not rolling them tightly enough. Use about 1/3 to 1/2 cup of filling per tortilla, no more. Warm tortillas are also easier to roll without cracking, so if yours are cold from the fridge, warm them for a few seconds first.
Wraps turning out too dry? Make sure your cream cheese is fully softened before mixing, and don’t skip the sour cream. These ingredients provide the moisture that keeps everything cohesive. Adding an extra tablespoon of sour cream to the mixture can help if you prefer things creamier.
Getting uneven browning? Your heat is probably too high. Medium heat gives the cheese inside time to melt before the outside burns. Press down gently but firmly with your spatula to ensure even contact with the pan.
FAQ
Can I make these wraps without cream cheese?
Yes, though the texture will be slightly different. You can use extra sour cream or Greek yogurt instead, or even add a bit of mayonnaise for richness. The cream cheese does help bind everything together nicely, but it’s not absolutely essential.
What’s the best way to reheat these wraps?
A dry skillet over medium-low heat works best, taking about 2 to 3 minutes per side. You can also use a toaster oven at 350°F for 5 to 7 minutes. Avoid microwaving if possible, but if you must, wrap in a damp paper towel and heat in 30-second bursts.
Can I add vegetables to the filling?
Absolutely! Sautéed bell peppers, onions, spinach, or mushrooms all work wonderfully. Just make sure to cook them first and drain any excess moisture before adding to the cheese mixture, or your wraps may get soggy.
How do I prevent the tortilla from getting soggy?
Cook them immediately after assembling, and make sure your filling isn’t too wet. If your chicken was frozen and thawed, drain any excess liquid. Always serve these fresh for the best texture, as they tend to soften as they sit.
Can I make these wraps spicy?
Sure! Add red pepper flakes to the chicken mixture, use pepper jack cheese instead of mozzarella, or mix some hot sauce into the cream cheese blend. You can also add diced jalapeños or a pinch of cayenne pepper.
What size tortillas work best?
Large 10-inch flour tortillas are ideal. Anything smaller makes rolling difficult with this much filling. Burrito-size tortillas also work great. Avoid using small taco-size tortillas as they won’t hold enough filling.
Cheesy Garlic Chicken Wraps
Ingredients
Equipment
Method
- Sauté garlic by melting 1 tablespoon butter in a skillet over medium heat. Add minced garlic and cook for 30 seconds until fragrant.
- Season chicken by adding it to the skillet with garlic powder, Italian seasoning, salt, and pepper. Stir for 2 minutes to warm through, then remove from heat.
- Make cheese mixture by combining cream cheese, sour cream, and half the shredded cheese in a bowl. Mix until smooth, then fold in the seasoned chicken.
- Assemble wraps by dividing filling among tortillas, placing it down the center. Sprinkle remaining cheese on top, fold sides in, then roll tightly.
- Cook wraps by brushing remaining butter on each wrap. Place seam-side down in a hot skillet and cook 2-3 minutes per side until golden brown and cheese melts.
- Serve immediately by cutting wraps in half diagonally. Garnish with fresh parsley if desired.
Notes
- Use rotisserie chicken for quickest prep time.
- Warm tortillas slightly before rolling to prevent cracking.
- Don’t overfill wraps or they’ll be difficult to roll.
- Press down gently while cooking to help seal and brown evenly.