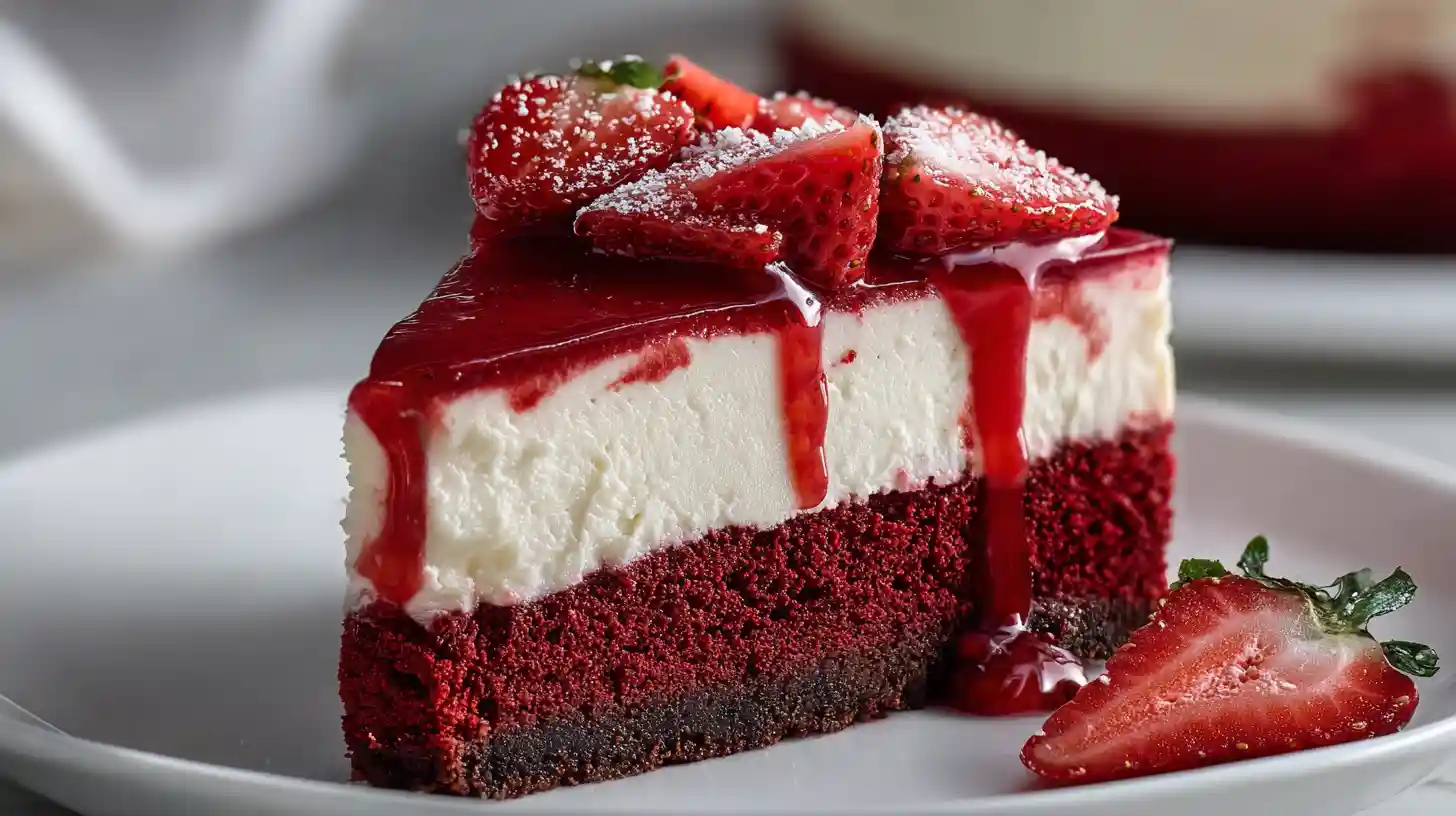
There are certain desserts that simply command attention the moment they hit the table, and this Red Velvet Strawberry Cheesecake is absolutely one of them. It is the kind of treat that looks intimidatingly beautiful but is surprisingly approachable to make at home. If you have been searching for dessert cake ideas that merge two classics into one unforgettable bite, you have arrived at the right recipe. The contrast between the deep crimson cake and the blush-pink cheesecake layer is not just visually stunning—it is a flavor combination that works on every level.
I distinctly remember the first time I tried combining these two worlds. I couldn’t decide between baking a birthday cake or a cheesecake, so I thought, “Why not both?” The result is a dessert that feels celebratory and indulgent without being overly heavy. The tang of the cheesecake perfectly cuts through the rich, cocoa-infused sweetness of the red velvet base. Whether you are planning a romantic Valentine’s dinner or just want to elevate your weekend baking, this recipe delivers on all fronts.
Why This Mashup Works So Well
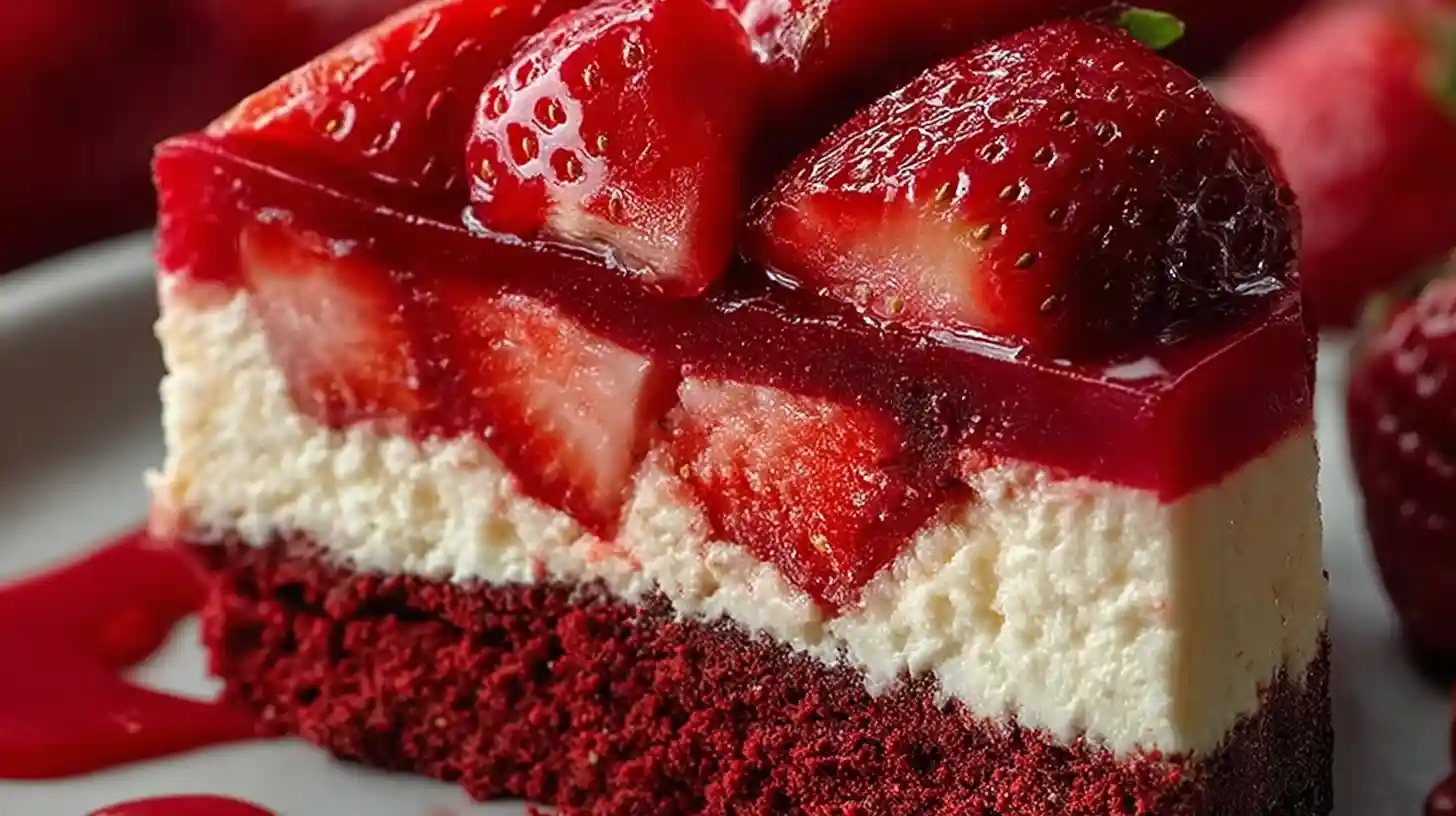
Red velvet cake is famous for its mild chocolate flavor and moist, tender crumb, usually paired with cream cheese frosting. By swapping the frosting for an actual cheesecake layer, you amplify that tangy, creamy element that makes red velvet so good. Adding fresh strawberries into the mix brings a brightness that lifts the entire dish. It is essentially the best of cake and sweets combined into one glorious springform pan.
Ingredients for the Perfect Layers
This recipe has three main components: the cake base, the cheesecake filling, and the topping. Quality matters here, especially for the fruit and dairy.
For the Red Velvet Base
You will need standard pantry staples like flour, sugar, and cocoa powder. The key to that signature texture is buttermilk and white vinegar—don’t skip them! They react with the baking soda to give the cake its velvety lift. And of course, red food coloring is essential for the dramatic look.
For the Strawberry Cheesecake Filling
This is a no-bake style cheesecake layer that sits atop the baked cake. You’ll need softened cream cheese, powdered sugar, heavy whipping cream, and fresh strawberries. Using fresh fruit instead of artificial flavoring makes a huge difference in the final taste.
Step-by-Step Baking Guide
Let’s break this down into manageable steps so you don’t feel overwhelmed. It is really just baking a cake and then mixing a filling.
- Bake the Cake Base: Preheat your oven to 350°F (175°C). Whisk your dry ingredients in one bowl and your wet ingredients (oil, buttermilk, eggs, coloring, vinegar) in another. Combine them gently—overmixing leads to tough cake. Pour into a greased springform pan and bake for about 25-30 minutes. The most crucial part? Let it cool completely. If you put cheesecake filling on a hot cake, it will melt into a soup.
- Make the Berry Puree: While the cake cools, blitz your strawberries in a blender. If you want a super smooth look, press the puree through a fine-mesh sieve to remove the seeds, though leaving them in adds a nice rustic touch.
- Whip the Filling: Beat the cream cheese and sugar until smooth. Fold in your strawberry puree. In a separate cold bowl, whip the heavy cream to stiff peaks and then gently fold it into the strawberry mixture. This aeration gives the cheesecake its mousse-like texture.
- Assemble and Chill: Spread the pink filling over the cooled red velvet layer. Smooth the top with an offset spatula. Now comes the hard part—waiting. It needs at least 4 hours in the fridge to set properly.

Decoration and Serving Ideas
When it comes to cake and dessert presentation, simple is often best. A ring of fresh strawberry halves around the edge looks elegant and hints at the flavor inside. You can also pipe generous swirls of stabilized whipped cream around the border.
If you want to get fancy, a drizzle of chocolate ganache or white chocolate shavings adds a nice contrast. Serve it chilled, straight from the fridge, for clean slices. Dip your knife in hot water and wipe it dry between cuts to get those perfect, sharp layers.
Pro Tips for Success
Room Temperature is Key: Ensure your cream cheese and eggs are at room temperature before you start. Cold cream cheese results in lumpy filling, and nobody wants to bite into a chunk of plain cheese.
Don’t Rush the Cooling: I cannot stress this enough. If the red velvet base is even slightly warm, it will destabilize the cheesecake mixture. You can pop the cake in the fridge to speed up the cooling process if you are in a hurry.
Springform Pan Safety: To ensure easy removal, run a thin knife around the inside edge of the pan before unclasping the ring. This prevents the cheesecake from sticking and tearing.
Variations to Try
The “White Velvet”: Skip the cocoa powder and red dye for a vanilla cake base if you want an all-pink-and-white aesthetic.
Chocolate Lover’s Twist: Add melted white chocolate into the cheesecake filling for a richer, truffle-like consistency. Or, use a chocolate ganache topping instead of fresh fruit.
Mini Cheesecakes: You can make this recipe in a muffin tin! Bake small rounds of cake, press them into liners, and top with the filling. They make excellent individual dessert cakes for parties.
Storage Instructions
This cake keeps beautifully in the refrigerator for up to 3 days. Cover it loosely with plastic wrap or keep it in a cake dome. I do not recommend freezing this specific version because the fresh strawberries in the filling can release water when thawing, making the texture a bit grainy.
FAQ
Can I use frozen strawberries?
Yes, but you must thaw and drain them extremely well. Excess liquid will prevent the cheesecake from setting properly. Fresh is usually safer for texture.
Why is my cheesecake filling runny?
This usually happens if the whipped cream wasn’t whipped to stiff peaks or if the strawberries were too wet. You can try adding a teaspoon of gelatin dissolved in water to the mixture to help it set firmer.
Can I bake the cheesecake layer instead?
This recipe is designed for a no-bake filling. If you want a baked cheesecake layer, you would need to bake it separately or lower the oven temp significantly after the cake layer is done, which gets complicated. Stick to the no-bake method for ease!
What if I don’t have buttermilk?
You can make a substitute! Add 1 tablespoon of lemon juice or vinegar to a cup of regular milk and let it sit for 5 minutes until it curdles slightly.
Can I use a store-bought cake mix?
Absolutely. A boxed red velvet mix works perfectly as the base. Just follow the instructions on the box for a 9-inch round cake.
Is gel or liquid food coloring better?
Gel is generally better because it is more concentrated, so you add less liquid to the batter, but liquid coloring works fine if that is what you have on hand.
Red Velvet Strawberry Cheesecake
Ingredients
Equipment
Method
- Preheat oven to 350°F (175°C) and grease a 9-inch springform pan.
- Mix flour, sugar, baking soda, cocoa, and salt in a bowl. In a separate bowl, whisk oil, buttermilk, eggs, food coloring, and vinegar.
- Combine wet and dry ingredients gently, then pour into the pan. Bake for 25-30 minutes. Cool completely.
- Beat cream cheese and powdered sugar until smooth. Stir in strawberry puree.
- Whip heavy cream to stiff peaks in a separate bowl, then fold into the strawberry mixture.
- Spread filling over the cooled cake layer. Chill in fridge for at least 4 hours before serving.
Notes
- Ensure the cake is fully cooled before adding filling to prevent melting.
- Strain strawberry puree for a smoother cheesecake texture.